Chicken Apple Sausage

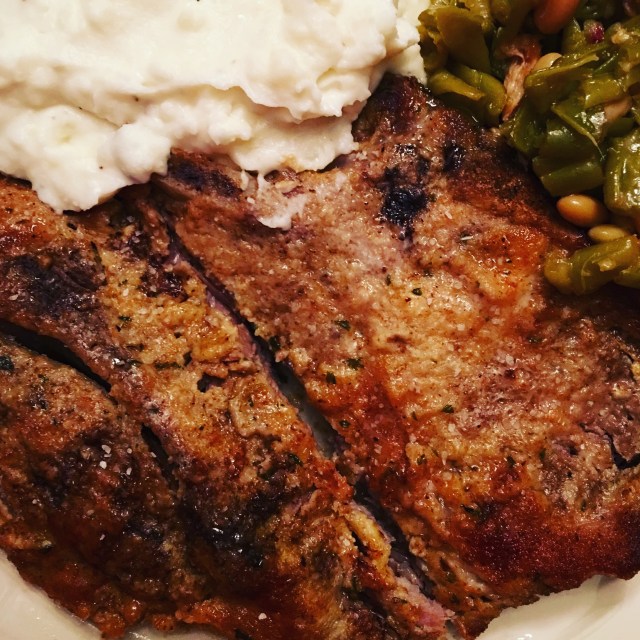
I’ve been making my own sausage for several years.  And while you definitely need some special equipment, i.e. meat grinder and sausage stuffer, it’s a really fun and actually pretty easy process.  The thought of store-bought sausage makes some people wince – what in the world do they put in that stuff??  Whether you make fresh or smoked, you can control ingredients, flavors and salt content by making your own.  Below is a recipe for fresh chicken apple sausage, flavored with onions, garlic and allspice.  I hope you love it!

FullSizeRender 8.jpg

CHICKEN APPLE SAUSAGE

Ingredients

  • 3 1/2 Lbs. Boneless Skinless Chicken Thighs
  • 2 Lbs. Boneless Skinless Chicken Breasts
  • 2 Medium Honeycrisp Apples, Peeled
  • 1/2 Large White Onion
  • 1 1/2 Tbs. Butter
  • 1 1/2 Tbs. Kosher Salt
  • 1 1/4 Tsp. Black Pepper
  • 1 Tsp. Garlic Powder
  • 1 Tsp. Ground Allspice
  • 1/2 Tsp. Ground Thyme
  • About 9 feet of fresh hog casing

Instructions

  • Slice chicken into 1-inch strips.  Place in freezer for 15 minutes while you prepare apples and onions.
  • Using the largest holes on a box grater, grate peeled apples and onion.  Sauté in a large frying pan with butter for 10-15 minutes.  They should be soft and moisture should be evaporated.  Allow to cool in bowl.
  • Using a meat grinder, or grinder attachment on your mixer, grind semi-frozen chicken on the finest grind.  Grind into a large mixing bowl so that you have room to mix in spices, etc.
  • Add apple and onion mixture to ground chicken an mix with your hands to incorporate evenly.
  • Sprinkle all seasonings evenly over mixture and then mix again with hands until combined.
  • Place ground mixture into a sausage stuffer.
  • Stuff into hog casings and link into 3-4 inch sections.  Allow to dry on a cookie sheet for 15-20 minutes.
  • You can now cook immediately on the grill or in a pan.  However, the flavors will be better if the sausage rests for a day or longer.  We freeze ours in a vacuum sealer.

The sweetness of the apples combined with the savory onions, garlic and thyme make for a delicious combination!  You’ll find that this recipe has a lot less fat than store-bought sausage so be careful not to overcook and dry it out.  If you have the time and tools, give it a try – I think you’ll find yourself making sausage more often than buying it.  Either way, dig in!!

Blueberry Salad w/Homemade Balsamic Dressing

After a few weeks of heavy holiday eating (we loved every minute of it!) it’s time to lighten the menu.  This salad recipe elevates mixed greens with the sweetness of blueberries, bite of red onions and saltiness of feta cheese.  Now, on their own these are a wonderful combination, but they’re even better when drizzled lightly with this perfectly balanced balsamic dressing!  Great at any time of the year, it’s a bright crisp addition to any meal, especially with winter soups and stews.

img_0449

BLUEBERRY SALAD

Ingredients

  • 4 Cups Mixed Greens
  • 1 Cup Blueberries
  • 1/4 Red Onion, Sliced Thinly
  • 1/2 Cup Crumbled Feta Cheese

HOMEMADE BALSAMIC DRESSING

Ingredients

  • 1/3 Cup Extra Virgin Olive Oil
  • 3 Tbs. Cranberry Pear Balsamic Vinegar
  • 1 1/2 Tbs. Sugar
  • 1 Tsp. Dijon Mustard
  • 1/4 Tsp. Salt
  • 1/4 Tsp. Black Pepper

Instructions

  • In a small bowl or mason jar with lid, place all dressing ingredients.
  • Whisk together or close lid and shake well until thoroughly mixed and sugar is dissolved.
  • Refrigerate until used or up to 1 week.
  • Y0u can use any fruited balsamic vinegar or white wine vinegar for a lighter, more neutral flavor.
  • Arrange salad ingredients on 2-4 plates, depending on portion size.  Drizzle lightly with dressing.

This is a basic recipe that can be updated with all kinds of variations.  Try substituting dried cranberries and orange segments for the blueberries and goat cheese for the feta.  As long as you keep the balance of sweet, tart and salty.  I also like adding the crunch of candied pecans, toasted pine nuts or salty pistachios.  Give a few of them a try and let me know your favorite combination.  I’m sure you’ll get a lot of use our of the recipe from weekday suppers to weekend dinner parties.  Dig in!

Butterscotch Chocolate Chip Cookies

There’s no cookie more iconic than chocolate chip!  And I’ve had an awesome variety of big, small, crispy, chewy and more that have all been fantastic.  This recipe though is a little twist on your favorite.  With a chewy consistency and the addition of butterscotch chips, they’re a great take on the American classic.  If you can pull yourself away from your go-to family recipe, give these a try this holiday season – or any time of year for that matter…

FullSizeRender 14.jpg

BUTTERSCOTCH CHOCOLATE CHIP COOKIES

Ingredients

  • 1 Cup Butter-Flavored Shortening
  • 2 Cups All-Purpose Flour
  • 1 Cup Sugar
  • 1/2 Cup Packed Light Brown Sugar
  • 2 Eggs
  • 1 Tsp. Baking Soda
  • 1 Tsp. Salt
  • 2 Tsp. Vanilla
  • 6 Ounces Semi-sweet Chocolate Chips
  • 6 Ounces Butterscotch Chips

fullsizerender-13

Instructions

  • Preheat oven to 375 degrees.
  • In a large mixing bowl, beat together shortening, eggs, sugar, brown sugar and vanilla until light and fluffy.
  • In a small bowl, mix together flour, baking soda and salt.
  • Add dry ingredients to wet and mix well.
  • Using a spoon, fold in both types of chips until evenly distributed.
  • Use a 1-inch cookie scoop or drop by spoonful onto a parchment-lined cookie sheet about 2 inches apart.  Bake 8-10 minutes until edges are golden brown.
  • Remove from oven and place on a cooling rack.  Store in an airtight container.

Even if you’re not a huge butterscotch fan you’re going to love these cookies.  And maybe, just maybe, they might become your new family favorite.  Get a glass of ice cold milk and belly up to the kitchen table for a few.  Dig in!

Coconut Cookies

Let the holiday cookie-making continue!  My wife introduced me to one of her favorites back when we were dating and they quickly became one of my favorites too.  Here’s the twist, there’s no coconut in them!  The interesting combination of instant mashed potato flakes and coconut flavoring will fool anyone.  And you will absolutely love the crispy edges and chewy middles with a hot chocolate or coffee by the fireside.

fullsizerender-10

COCONUT COOKIES

Ingredients

  • 1 Package or 1 1/3 Cups Instant Mashed Potatoes
  • 1 Cup Bisquick (or similar baking mix)
  • 1 Cup Sugar
  • 1/2 Cup Margarine, Softened
  • 1 Egg
  • 1 Tsp. Coconut Flavoring

Instructions

  • In a medium bowl cream together butter and sugar.  Add coconut flavoring and mix well.
  • Add egg and beat well with an electric mixer.
  • Stir in Bisquick and potato flakes, with a spoon, until mixture comes together.
  • Cover and chill cookie dough in refrigerator for 1 hour or longer.
  • Preheat oven to 375 degrees.
  • Form dough into 1-inch balls and place on a parchment-lined cookie sheet 2 inches apart.
  • Bake 8-10 minutes until edges are lightly browned.
  • Remove from oven and put cookies on a wire rack to cool thoroughly.
  • Store in a covered container.

Simple, weird and totally delicious!  Try making a batch of these this year for something a little different on your cookie platter.  I hope you love them as much as we do.  Dig in!

Peanut Butter Buckeyes

If you’re from Ohio, you’ve likely had the peanut buttery goodness of BUCKEYES!!  Shaped like the seed from our state tree, these namesake treats are a hit for the holidays or any time of the year.  You’ll find them at almost any store in Ohio that sells confections and definitely at Ohio State football tailgates!  Good news is, you don’t have to be an OSU fan or from Ohio to love the perfect combination of peanut butter and chocolate – just ask all of our Minnesota friends who clamored for a treat box of Buckeyes around the holidays.

FullSizeRender 6.jpg

PEANUT BUTTER BUCKEYES

Ingredients

  • 18 Ounces Creamy Peanut Butter
  • 1 Lb. Powdered Sugar
  • 1/4 Cup Margarine
  • 12 Ounces Semisweet Chocolate Chips
  • 1/2 Ounce Parafin Wax

Instructions

  • Using a stand mixer (you’ll need a heavy duty one) with a dough hook attachment, cream together peanut butter and margarine until smooth.
  • Add powdered sugar a little at a time and mix on low until thoroughly combined.
  • Roll into one inch balls and place on a cookie sheet lined with parchment paper.
  • Place balls in freezer for 15 minutes to harden.
  • While peanut butter balls are in the freezer, use a double boiler (or a metal bowl over a pot of simmering water) to melt chocolate chips and wax together.
  • Remove balls from freezer.  Using a toothpick, pierce each ball and dip 3/4 of the way into chocolate/wax mixture.  Place on parchment paper.  Chill a full tray in the freezer again for 10 minutes or until chocolate is set.
  • Keep stored in an airtight container.  I like to keep them in the fridge, but they’re fine at room temperature too.

There’s little practice involved in the dipping process, but overall these are really easy to make.  A good tip is to use a small bowl or boiler for the chocolate as you want the chocolate to be deep enough to dip into.  You can also make 1 1/2 of the chocolate/wax mixture to make it easier.  We like to then use the excess chocolate to dip pretzels in.  Or try mixing in enough corn flakes to coat them thoroughly.  Drop in small spoonfuls on a parchment-lined cookie sheet and top with sea salt flakes – wow are those good!  Try the buckeyes, share with your family and friends and make it a favorite holiday tradition like it is for us.  Dig in!!

B Spot – Strongsville, OH

There are a lot of places to get a burger around town, but few reach the grand height of deliciousness as Michael Symon’s B Spot!  In a world of frozen patties and fast-minded service, B Spot stands out for their fresh ground burgers, inventive topping combinations and homemade sauces.  On a recent trip to Cleveland for business I had my first taste of B Spot while having lunch with my sister.

fullsizerender-2

In a busy strip mall you’ll find the warm and inviting atmosphere of B Spot.  It’s decorated with wood and metal and enough TV’s for sports, but not an overwhelming bar feel.  It was busy for a late Sunday lunch, but it’s the holidays and we were near the mall so I expected as such.  I’ve heard it’s busy like this all the time though!  We were seated and immediately greeted by friendly staff.  There’s an ample craft beer selection and a list of made-to-order milkshakes that can be amped up with booze if you so choose – hello!!  I had a blonde ale from Sibling Revelry since it’s a friend’s friend’s new brewery, an excellent choice I might say!

fullsizerender

The place is known for their burgers, but there was a good menu with choices like house-made bratwurst and bologna sandwiches.  I settled on the Fun Guy – sautéed mushrooms and onions and topped with cheese.  My sister had the Fat Doug with pastrami, cole slaw and swiss.  Both were perfectly cooked to order, extremely juicy and had just the right ratio of meat-to-bun-to-toppings that let you get a tasty bite of everything every time!  I love when you can really enjoy a burger without it all falling apart and these hit the nail on the head.  I thought the size was perfect, but you can add a patty if you’re tank is running a little on empty.  We split the rosemary fries which was enough for two to share.  Salty, crispy and perfumed with herbs, they were excellent and not the typical disappointing fries you get in most places.

fullsizerender-3

You can enhance all of the food with 6 different signature sauces at your table – I love the coffee BBQ and the mustardy relish!  Oh, did I mention there’s a house-made pickle bar??  Honestly, everything was done right here and the attention to detail was really refreshing considering they’re growing quickly.  With 8 locations in Ohio, Detroit and Indianapolis you have no reason to not seek one out and have a great lunch or dinner.  I can’t wait for a chance to try the New School bologna sandwich and a side of pork cracklings!!  Thanks Michael, for putting the ingredients first and keeping the burger game real in middle America!!  You can check out their website here for menu and locations bspotburgers.com. Dig in!

My Favorite Layered Cheesecake

For my entire life my mom has been making her family cheesecake recipe for the holidays and special occasions.  And as I learned to cook, I began making the same recipe that her grandmother made for as long as she can remember.  So what’s the big deal?  First, you make it in a 13 x 9 pan – so you know there’s plenty to go around and then some!  Second, rather than a single layer of dense creamy goodness, this recipe calls for a rich sweet cream cheese layer and is topped with a sour cream and sugar mixture that gives a secondary texture and a slight bite.  It’s easy to make, but everyone will think you spent a ton of time on it – read how simple it is below.

fullsizerender-9

MY FAVORITE LAYERED CHEESECAKE

Ingredients

Crust:

  • 2 Cups Graham Cracker Crumbs
  • 1/4 Cup Sugar
  • 1/3 Cup Melted Butter

Filling:

  • 3 Bricks (8 Oz. each) Cream Cheese, Softened
  • 1 Cup Sugar
  • 5 Eggs, Room Temperature
  • 1 1/2 Tsp. Vanilla

Topping:

  • 24 Oz. Sour Cream
  • 4 Tbs. Sugar

Instructions

  • Preheat oven to 325 degrees.
  • In a small bowl, thoroughly mix crust ingredients with a fork.  Pour into a 13 x 9 metal baking pan and press firmly and evenly.  Set aside.
  • In a large bowl or stand mixer, lightly beat cream cheese until smooth.  Add 1/4 Cup sugar and beat.  Add one egg and beat.  Continue alternating until all sugar and eggs have been combined with cream cheese.  Mixture should be smooth and free of any lumps.
  • Mix in vanilla and then pour mixture over crust in pan.
  • Bake at 325 degrees for 45 minutes.
  • Remove from oven.
  • Turn oven up to 425 degrees while you mix topping.
  • Stir together sour cream and sugar until combined and smooth.  Pour and spread evenly over baked cheesecake.
  • Return to oven and bake at 425 degrees for 10 minutes.
  • Remove from oven and allow to cool completely.  Cover and refrigerate for at least 4 hours before serving.

I hope you love this decadent dessert as much as my and my wife’s family do!  It will surely be a hit and requested for all of your family functions.  While we aren’t formal and normally serve it out of the pan, you can cut and arrange on a platter for a party, shower, etc.  I recommend using a sharp knife and dipping it in warm water after each cut to prevent sticking and to achieve perfect squares for serving.  Dig in!!

Sticky Cinnamon Rolls

Holidays were made for indulgences.  Let’s face it, I ate a significant portion of the 65 lbs of ham and turkey I made for Thanksgiving a few days ago.  So why not go the extra mile for my family in town this morning by making some homemade cinnamon rolls?!  Calorie counting will commence promptly on Monday, but I will continue to enjoy the rest of this weekend.  You’ll love the recipe below because it’s easy and also offers a twist with the addition of apricot honey butter (from my home town) and chopped pecans.  Go ahead, make some for yourself and make any weekend morning special.

IMG_0334.JPG

STICKY CINNAMON ROLLS

Ingredients

Instructions

  • Preheat oven to 375 degrees.
  • Warm jar of honey butter in microwave for 30 seconds.  Remove and pour contents into bottom of a 9″ round non-stick pan.  For this recipe I used apricot pecan honey butter from a candle and honey company in Medina, OH called A.I. Root.  However, you an also find the same flavor combination here or at your local retailer.
  • Roll out pizza or bread dough to a 12-inch x 12-inch square.
  • In a small bowl, stir together brown sugar, pecans and cinnamon.  Spread in a thin even layer over the pizza dough going completely to the edges.
  • Roll dough from one side tightly until you have a long tube.
  • Cut rolled dough into six pieces and then place sideways into pan of honey butter.  Arrange five on the outside and one in the middle.  Press down slightly so that all edges are touching.
  • Bake at 375 degrees for 12-14 minutes until top is golden brown and middles are no longer gooey.
  • Remove from oven and top with a heat-safe platter.  Turn baking pan upside down to turn out finished rolls.  Scrape any excess honey butter and pecans onto the top of the cinnamon rolls.
  • Allow to cool for 5 minutes and then serve immediately.

This super-sweet decadent treat is perfect for weekend company or for a brunch event.  It would be easy to triple this recipe and make them in a 13×9 pan as well.  You can also substitute any kind of honey butter here, but I’ll tell you that the apricot gives a wonderful fruity hint to any otherwise really sweet dish.  Either way, I think you’ll make these again and again when you feel the need to indulge.  Dig in and enjoy!

Breaded Pork Chops

Sunday supper and football season = breaded pork chops.  My mom has made this recipe for as long as I can remember – I’ve seriously watched her make these 100 times or more!  And I have never once been disappointed in the result.  When you think breaded pork chops, you think of a crispy schnitzel or something similar.  However, the combination of frying and then slow cooking gives you soft savory no-knife-needed pork chops.  This is the ultimate in comfort food and will be part of your regular rotation for the rest fall and winter!

img_0306

BREADED PORK CHOPS

Ingredients

  • 12 Bone-In Center Cut Pork Chops (about 1/2 to 3/4 inch thick)
  • 3 Eggs, Beaten
  • 1 1/2 Cups Seasoned Bread Crumbs
  • 6-8 Tbs. Canola Oil
  • 1/4 Cup Water

Instructions

  • Preheat oven to 325 degrees.
  • Using two paper plates, creating a dredging station with beaten eggs in the first plate and bread crumbs in the second.
  • Heat an electric skillet, or a cast iron skillet on the stove top, to about 350 degrees.  Add half of the canola oil.
  • Dip each pork chop first in egg and then in bread crumbs.  Shake off excess and place in hot oil.  Brown 3-4 chops at a time.  Do not overcrowd pan.
  • Brown in oil for 2 minutes per side and place into a glass 13 x 9 baking dish.  Continue process adding more oil as needed until all chops are done and stacked in baking dish.
  • Pour 1/4 cup water into the baking dish and cover tightly with foil.
  • Bake for 2 hours at 325 degrees.
  • Serve immediately.

The simplicity of the ingredients and the slow cooking really bring out the best flavor of the pork.  The fat will render from the breading and the meat so make sure you remove the finished chops from the cooking liquid to both serve and store leftovers.  You won’t believe how tender these turn out – both for dinner and leftovers the next day!  Comfort food is served – thanks mom!  Dig in!

Thai BBQ Short Ribs

While I’ve never had a chance to travel to Asia, I absolutely love all kinds of food from the region.  This recipe for short ribs draws inspiration from Thai cooking and uses satay sauce as the base for the marinade.  Satay is usually made with coconut milk, peanuts, garlic and spices.  It’s an easy marinade that’ll make you devour these short ribs with all their fatty goodness!  You’ll want to try it on chicken as well – the peanut, coconut and spice all make for a warm nutty bbq treat.

img_0281

THAI BBQ SHORT RIBS

Ingredients

  • 3 Lbs. Sliced Beef Short Ribs
  • 1/2 Cup Prepared Satay BBQ Sauce (available in most grocery stores with Asian foods)
  • 2 Cloves Fresh Garlic, Minced
  • 4 Tbs. Lite Soy Sauce
  • 3 Tbs. Brown Sugar
  • 2 Tbs. Toasted Sesame Oil
  • 1 Tbs. Fresh Lime Juice
  • Pinch Red Pepper Flakes

fullsizerender-3

Instructions

  • In a small bowl, stir together satay bbq sauce and remaining ingredients until smooth and brown sugar dissolves.
  • Brush both sides of each short rib with marinade and stack in a 13×9 baking dish.
  • Pour any remaining marinade over the short ribs.
  • Cover with plastic wrap and marinate in the refrigerator for at least 4 hours.
  • Remove from fridge and allow to come to room temperature, about 30 minutes.
  • Remove each rib from the baking dish and shake off an excess marinade as you place them on a hot grill.  Grill short rib slices over medium heat for 5-7 minutes per side.  Flip them several times to avoid burning the marinade.
  • Serve immediately.

If you’re a fan of Thai food or this is your first foray into the world of satay, I think you’ll be glad you made this recipe!  You can also use the recipe above and substitute an equal amount of peanut butter for the brown sugar and use it as a dipping sauce!  The combination of richness, warmth and a hint of sweetness make this delicious on beef and chicken and any time of the year.  Dig in!